Create Homemade Incense Sticks
If you’ve ever been captivated by the earthy aroma of burning incense, you’re not alone. Incense sticks have been a staple in homes, meditation practices, and rituals for ages. Many people enjoy burning them for their soothing scents or spiritual reasons, but what if you could make incense sticks at home? It’s possible. Making homemade incense sticks can be a relaxing and creative project that lets you control the ingredients, costs, and scents.
This article is part of a fragrance blog I built myself — I’ll explain how at the end if you’re curious.
Why Make Homemade Incense Sticks?
There’s a certain satisfaction in crafting something by hand, especially when you get to enjoy it later. Homemade incense sticks offer a wide range of options for what can be included. If you’re looking to avoid synthetic fragrances or are sensitive to certain chemicals, creating your own lets you choose every ingredient. You can tailor scents to your mood or even make batches as gifts.
Many people also find making incense meditative in its own right. Grinding herbs, mixing powders, and shaping sticks can be calming activities that slow things down and connect you to the process. You might also find it rewarding to teach the technique to friends or family, making it a group activity.
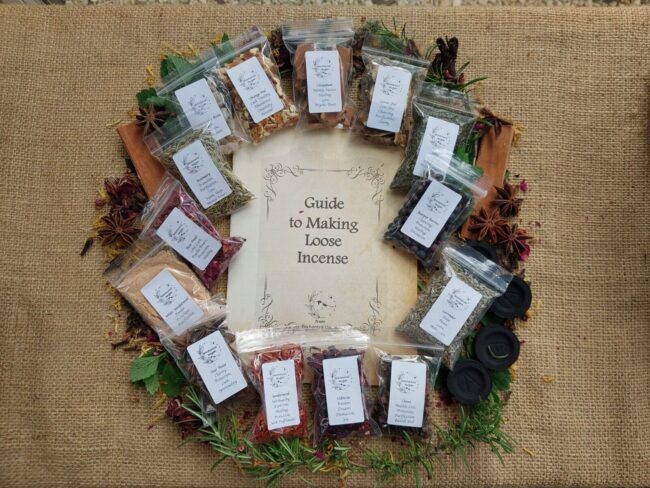
Loose Incense Making Kit 14 Herbs, Barks, Resins & Guide & Recipes Wicca Pagan
Related Article: Alcohol Free Perfume
Cost: Is DIY Worth It?
Making your incense sticks is a budget-friendly option, especially if you already have some herbs or spices on hand in your kitchen. Store-bought incense isn’t super expensive, but prices can add up if you burn it regularly or like artisanal blends. A small starter kit of makko powder (the natural binder), charcoal powder, and some dried herbs or essential oils doesn’t cost much. You’ll likely be able to make a large batch at a lower price per stick than what you’d pay at a speciality shop.
Homemade incense also means you’re in charge of the quality. There’s no need to wonder about hidden preservatives or artificial perfumes—what you see is what you get. For individuals who burn incense daily, the savings and health benefits can be pretty significant. Additionally, buying ingredients in bulk can provide substantial long-term savings and the freedom to mix and match scents whenever inspiration strikes.
Safety: Are Homemade Incense Sticks Safe?
As long as you’re careful with your ingredients and follow good fire safety, homemade incense sticks are safe to use at home. Stick to using natural powders, resins, and essential oils, and avoid burning anything to which you’re allergic. Smoking bits and loose herbs can be irritating if used in large amounts or in poorly ventilated areas. Therefore, always let plenty of fresh air in and use a stable, non-flammable holder while they burn.
It’s good practice to make sure small children or pets can’t reach burning sticks. Never leave incense unattended, homemade or not. Also, consider testing your incense first before burning a whole stick; some blends can produce more smoke than expected.
Legal and Practical Considerations
If you’re making incense just for personal use, there aren’t any legal hoops to jump through in most places. Selling incense gets more involved. Laws vary by region, but most areas have guidelines for labelling, packaging, and safe production if you go commercial. If that’s your approach, research your local requirements before distributing sticks or selling them online. However, for home use, you can get started with crafting right away without needing any special permits.
Please note that scented items may occasionally trigger allergies or sensitivities in others. If you gift your handmade incense, let people know what ingredients you included.
Key Ingredients for Homemade Incense Sticks
Making homemade incense sticks requires only a few basic ingredients. Here’s what I usually reach for when whipping up a fresh batch:
- Makko powder: a natural binding agent made from the bark of the tabunoki tree. It holds the stick together and makes sure it burns evenly.
- Charcoal powder: Provides the fuel that helps the incense burn smoothly. If you can’t find this, extra makko powder will work in a pinch.
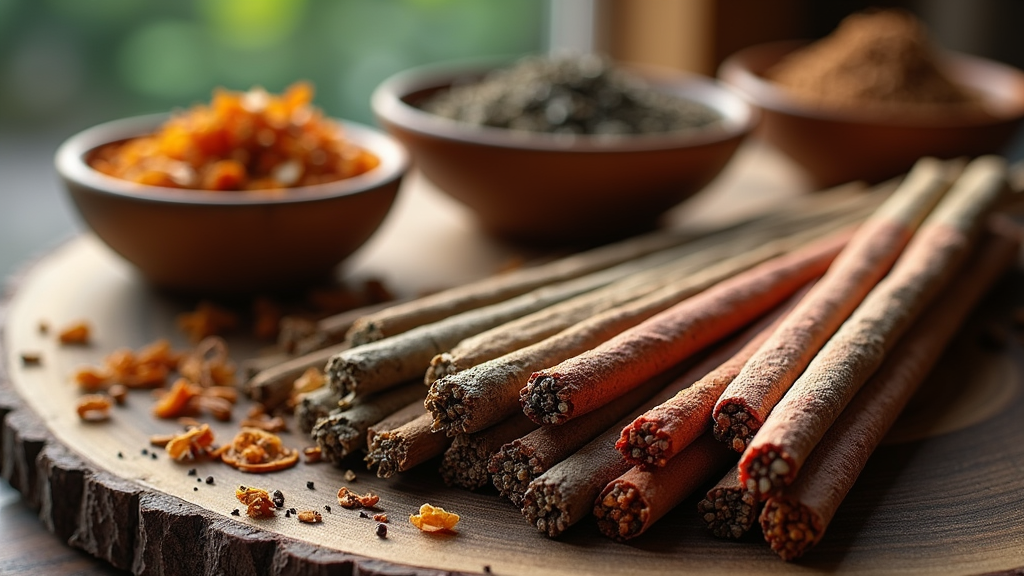
- Dried herbs, spices, flowers, or resins: These are the sources of your scent. Think lavender, sandalwood, cinnamon, clove, rosemary, rose petals, frankincense, and myrrh.
- Essential oils (optional): Great for boosting or customising your scent profile. Just don’t go overboard; a few drops go a long way.
- Wooden bamboo sticks serve as the core for your incense. You can skip them and roll the mixture into sticks or cones for a stick-free option.
- Water: Needed to bind the dry ingredients.
Related Article: Making Your Own Candles
How to Make Homemade Incense Sticks: Step-by-Step
If you’re ready for some hands-on crafting, here’s how I make incense sticks at home. It’s not complicated; just a bit of messy fun and some patience!
1. Grind Your Ingredients
Start with the raw materials. Grind your chosen dried herbs, flowers, or resin into a fine powder using a mortar and pestle or an old coffee grinder. The finer the powder, the smoother the incense will burn. You might want to sift the powder if it’s still chunky—this helps avoid clogs in the stick.
2. Mix Your Dry Ingredients
In a bowl, combine about two tablespoons of your ground herbs or resins with two tablespoons of makko powder (or a little more for a firmer stick). Toss in 1 tablespoon of charcoal powder if you have it. With experience, you’ll start to tweak ratios for firmer or softer sticks and different burn rates.
3. Add Essential Oils (Optional)
For an extra-strength aroma, add a few drops of essential oil directly to your mixture. Stir everything together until the essential oil is well blended in.
4. Add Water to Form a Dough
Slowly add a few teaspoons of water, stirring constantly. You want a doughy texture that holds together but isn’t sticky. I add water little by little; it’s easier to add more than to fix things if it gets too soupy.
5. Shape the Sticks
Grab your bamboo sticks and roll a small ball of dough between your hands. Then, press it onto the stick, smoothing it down and shaping it so that it covers the stick evenly. The incense dough should be firmly packed but not so thick that it cracks when drying. Aim for a stick that’s about 4 to 6 inches long.
If you’re not using sticks, try rolling small cones or logs instead and place them on a parchment-lined tray. Switching up the shape can even change how the scent disperses in your space.
6. Dry Thoroughly
Drying is super crucial for a good burn. I let my sticks dry for 2 to 5 days in a cool, dry place, rotating them daily for an even finish. Please don’t use them until they’re hard and scorched to avoid burning issues or uneven smoke. Waiting for them to dry thoroughly also makes the aroma more potent when burned.
Troubleshooting Homemade Incense Sticks
- : The stick won’t burn? Try adding a bit more makko or charcoal powder next time, or make sure your sticks are fully dry.
- Does the stick smell too smoky? Ease up on resins or charcoal powder and use more herbs or essential oils.
- Dough too crumbly? Add water a drop at a time until it binds.
Popular Scent Combinations to Try
- Lavender and sandalwood; relaxing and slightly woody.
- Cinnamon and clove, spicy, warm, and cosy.
- Rose and frankincense—floral with a hint of ancient aroma.
- Patchouli, rosemary, and cedarwood; earthy and herbal.
Creative Tips for Homemade Incense
Once you’ve mastered the basics, you can get creative with your blends. I like to mix small batches with different combinations and label them, so I know what to revisit. Some people press tiny dried flower petals into the surface for an eye-catching look, or blend in a hint of citrus zest for a fresher burn. The best part is you can personalise your incense completely.
Experiment with shapes, too. Cones and logs burn slightly differently and can make a significant difference if you get tired of classic sticks. You might even try adding a signature ingredient to create your trademark scent combination.
Frequently Asked Questions
How long do homemade incense sticks keep?
When kept in an airtight container away from moisture, your sticks can keep their aroma for 6 months or longer. Always store them in a cool, dry place to maintain freshness.
Do I need special safety gear for making incense at home?
Nothing fancy is needed, except for basic kitchen tools; however, a mask is helpful if you’re grinding a lot of spicy herbs or resins. Keeping your workspace clean and ventilated is always a good call.
Can I make incense sticks without a binder, such as mako powder?
Makko powder helps with burning and holding the stick together. If you can’t find it, try experimenting with other gums or a small amount of flour, but results may vary. Some crafters use gum arabic or tragacanth as alternatives.
Is it okay to use incense around pets?
Stick to natural ingredients and watch for any changes in your pet’s behaviour. Always use incense in a well-ventilated area and consult with your veterinarian if you have any concerns. Animals can be more sensitive to certain smells than humans.
How This Blog Was Created
Fragrances With Love started as a personal hobby — sharing my love of perfume, affordable finds, and fragrance trends. I didn’t start with a background in websites, marketing, or blogging.
This site was built by writing about something I genuinely enjoy. I use one platform to host my website, write my blog posts, and learn how to monetise content step by step, all in one place.
If you enjoy writing and have ever thought about starting a blog around something you love, you can see the platform I used to create this site below.
How I Created Fragrances With Love
Wrapping Up
Homemade incense sticks are a fun and practical craft that gives you more control over the scent in your home. Whether you want to relax with lavender and sandalwood, set a mood for meditation, or make fragrant gifts, mastering a few simple techniques will go a long way. Keep experimenting and enjoy those soothing scents! You’ll find that the process not only saves money but also connects you to centuries-old traditions, allowing you to bring a personal touch to your living space.
✨ Love Fragrance DIYs? ✨
Sign up for our newsletter for more scent-filled inspiration!
Just finished reading about how to create your own homemade incense sticks?
Why stop there?
Join the Fragrances With Love newsletter and get:
- 🌿 Easy step-by-step fragrance DIYs
- 🕯️ Tips for creating a calm and cosy home
- 💌 Exclusive content straight to your inbox
- 🛍️ Special offers on fragrance finds you’ll adore
Whether you’re a beginner or a seasoned scent lover, we’ll help you explore the art of beautiful, affordable fragrance—at home and beyond.
👉 Sign up now and never miss a scent-sational tip!